First of all, it depends on the type of microphone that you are going to use and where you are going to record.
If you are going to make a recording in a studio with more or less professional microphones, the process of setting can be more tricky and elaborate. Nevertheless, you will end up with a great result getting exactly what you want. One thing that you should keep in mind is that a microphone, doesn’t matter if it is a studio one or just a USB condenser mic – connect to a PC where you have your recording software. It is true to almost every type of mic, even for specific ones like top boundary microphones.
When you plugged the mic into your computer the latter should react immediately and display a sound control panel where you will see your mic. All the initial settings will be also possible to be made from there. If the computer doesn’t react immediately, there are two ways: you will have to open the sound panel manually and check if the computer “sees” the mic or not. In case the computer doesn’t display it, you should check if the mic is compatible with your operating system. Or check the settings of your computer, renew drivers and scan for possible errors.
You may also like: Best lavalier microphones
And keep in mind that some mics require additional power sources for work. For example, the Neumann microphone often works only with the supply of phantom power. When you set it, the signal should be low output. In case you are working with the professional audio software you will need to make settings there as well. Once again, audio systems can vary from quite basic to professional ones which have dozens of leverages and buttons. However, any of these systems for sure includes two elements – it’s the equalizer of the microphone and its volume leverage.
Also, you can regulate the sensitivity of the mic. If you are planning to stand further from the mic then the sensitivity should be higher (the further is the subject from the microphone, the higher the sensitivity should be). But in this case, beware of the technical noises which can be caused when the mic is too close to the monitors.
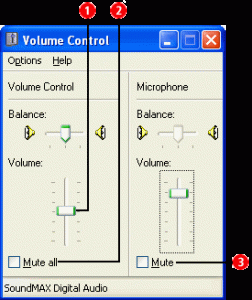 And, of course, the volume of the microphone is also regulated from the audio system.
Now let’s back to the case when you are using a microphone without an audio system, but you have special software on your computer. Make sure that your preamp is seen by your software.
Basically, it should be the same audio system but in digital mode. You will also see 3 leverages for adding low, middle and high frequencies and the regulator of the sensitivity. Depending on your software, the functions can verify and include extremely specific features. One of them is the autotune when the voice is getting corrected automatically.
Another essential aspect is that you should check if the soundcard of your PC/laptop is compatible with the microphone and software. In the situation when you have bought a super fancy mic and powerful multi-functional software but with the intention to use it on the weak processor with not so advanced sound card you risk that equipment won’t work at all. So take care of all the aspects before you run the software and ready to record.
OK, let’s imagine that all the necessary equipment is there, initial settings are done and the mic is ready for recording. You can make the trial record to see if the mic actually gives a signal. If the soundtrack gets wavy after you made a recording it means the mic is working and it has a signal.
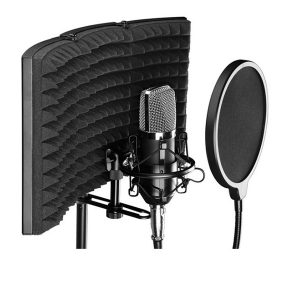
What you also need to take care of is the placement of the microphone. In most cases mic have either a mount stand or the tripod. The first is more convenient in the sense that it allows you to adjust the mic better to the position you need. With it, you can record standing or sitting or even laying on the floor.
With the microphone which has a tripod stand, you can always place the microphone in front of you. Regulate the height of it so the microphone is straight opposite to your mouth and don’t place it too far. The advantage of the tripod microphone is that it’s quite mobile so you can easily replace it at any moment that you can’t really say about the microphone with a stand mount.
Moreover, you might need some additional drivers to use the microphone on your computer. Usually, they are coming in the package with an item otherwise you will have to do the research yourself and figure out what driver exactly do you need and download it. Then you will have to go to your PC settings and switch it on there. There are a lot of cases when the mic doesn’t’ work easily on Windows 10.
If everything goes well and you are satisfied with the quality of the record then congratulations and good luck with your recordings.
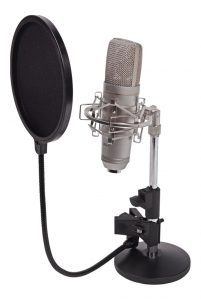
Depending on the microphone, there are usually 2 cables that you need to plug in – the USB and the power source. For more simple items, there is usually only the USB cable. When you connect the mic to your computer, no problems should occur and your PC will display that the mic is plugged in and suggest you adjust the settings. We have already discussed what to do if something goes wrong in the text above.
USB microphones are not regularly too powerful so your ordinary sound card should be enough to handle this type of the mic (unless you are using an extremely advanced and expensive product). The advantage of such mics is that you can easily connect them to your laptop. So considering the rest of the process, everything happens just the same as already described above, with a possible exception of not such detailed settings and the absence of an additional audio system.
Some microphones already come with a USB output connector. These devices consist of a microphone with a built-in USB audio interface. However, you should keep in mind that the quality of recordings made by such items will be considerably worse. There are some exceptions. On the other hand, if you are planning simply recording podcasts you don’t need a superior quality microphone which captures each tonality of your voice.
You may also like: Best microphone cases
